Interactive presentations with Scratch

Scratch from MIT is a wonderful tool to teach coding through storytelling. I have a book available through Teacher Pay Teacher on the fundamentals. This lesson is an extension of that book.
The lesson here focuses on user interaction within the story. Stories are not the only thing created with Scratch. I like using it for research projects. I also like it for extension projects for core content.
In this lesson, we are focusing on a project dealing with marine life and the echo system.
This is just the start of the project. In the coming lessons, I will explore options for creating a full project. The specifics of the project will be up to you and your students.
This lesson begins in an aquarium with an underwater scene. The scene includes a diver with whom we will interact.
Use the links below to gather the resources for the lesson.
Download the project sprite and backdrop.
Setting the scene
Go to Scratch at https://scratch.mit.edu and create a new project.
Set the name of the project to Alex’s Aquarium.

Click the create sprite button; choose the upload Sprite option.

Select the diver sprite.

Select the Scratch Cat sprite; click the delete button.

Click the Backdrop button and select the option to upload a Backdrop.

Select the underwater scene image.

The Code
Select the diver Sprite.

Select the Code tab.

Go to the Events section; place the when Flag clicked block on the canvas.

In our story, the diver is in an aquarium. His job is to provide information and tours to visitors. The diver spots us looking in the window and begins a conversation.
Get the Say code block for 2-seconds from the Looks section; attach it to the Flag block.
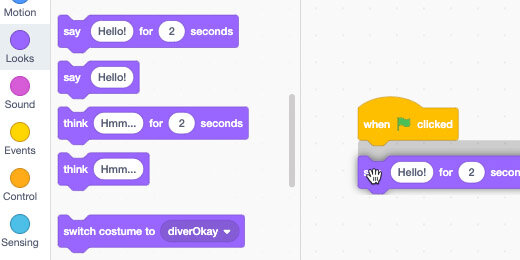
Leave the message at Hello and change the time from 2 to 4 seconds.

Place another Say block; set the text to “Welcome to Alex’s Aquarium”. Change the time to 4-seconds. All our time settings will be set to 4-seconds. This keeps things consistent.

Add another Say block. The diver introduces himself to the visitor. Type “My name is Joel” for the message.

It is only polite to ask for the visitor’s name. Place another Say block and ask for the visitor’s name.

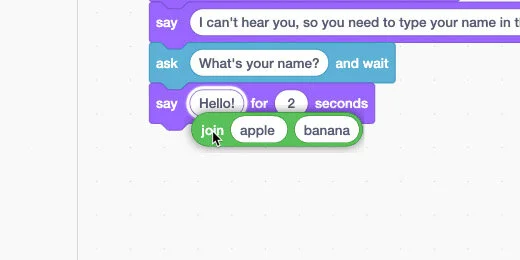
We need a way for the visitor to respond. Add another Say block. Set the message to—“I can’t hear you, so you need to type your name in the box below.”

It’s time to provide the input box. Go to the Sensing section. Attach the Ask and Wait block.

Make sure the Ask block is prompting for the visitor’s name.
Let’s welcome the visitor.
Return to the Looks section; attach a Say block.

We want to include the visitor’s name in our response.
Go to the Operators section. Find the Join block and place it in the Say parameter.
Type “Hello and welcome” into the left side of the Join block. Make sure to include a space after the word welcome. This prevents the joined words from running into each other.
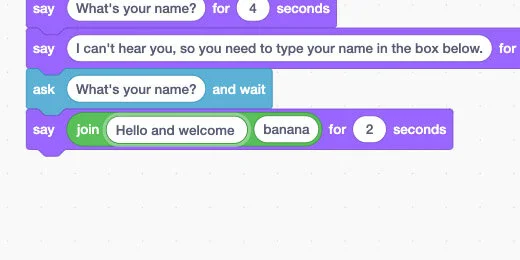
Go to the Sensing section; find the Answer variable. Drop it into the right side of the Join block. Remember to set the seconds to 4.

It's time to test our code and see what we have done up to this point. Click the green flag. The diver will proceed to display the messages in each code block. The last step prompts us for our name.
Type your name and press the Return key or click the checkmark.

Let’s ask the visitor another question. This time we will look for a specific answer.
Attach a Say block; type “We offer free tours to all visitors.”
Attach an Ask block; type “Would you like to take the free tour?” into the block.

We need to accept one of two responses–Yes or No. For this, we need a condition statement.
Attach an If…then…else code block from the Control section.

Place the equal operator from the Operator section into the If…then parameter.

Place the Answer variable from the Sensing section into the left side of the Equal operator. Change the number 50 to the word yes. The answer is not case sensitive.

Place a Say block into the if section. Place this text into the Say parameter–“Great! We will begin in a moment.”

Get another If…then…else block and place it into the else section of the first condition statement.
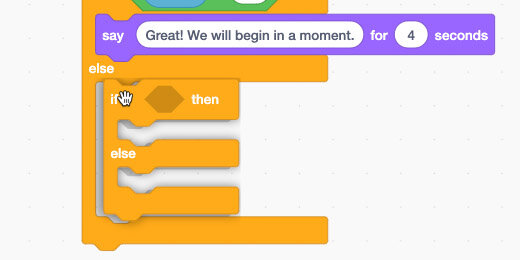
Right-click on the condition code block; select the duplicate option.
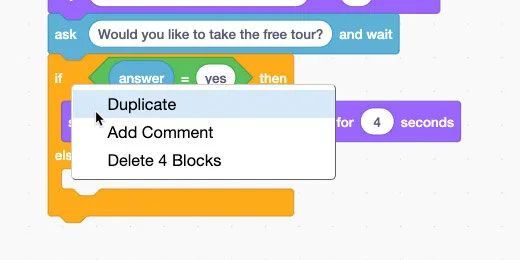
Drag the duplicate and place it within the Else section.

Change the Yes to a no. Change the message to read–“The tour is available all day if you change your mind.”

We have responses for the two possible answers. We should supply a response if something other than Yes or No is entered.
Place a Say block into the Else section. Set the text to read—“I’m sorry. I didn’t understand. Please enter Yes or No.”

Click the green flag and go through the program. Go through it once and enter Yes for the response. Go through it a second time and enter No. Go through it one more time and type anything other than yes or no.
If we enter anything other than yes or no–we are not prompted to respond again. We need to fix this and provide the visitor an opportunity to enter the correct response.
Disconnect the If…then…else main code block from the rest of the code.

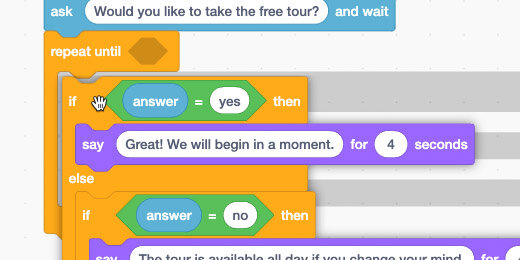
Add a Repeat Until loop to the end of the Ask code.

Insert the If…then…else code into the loop.
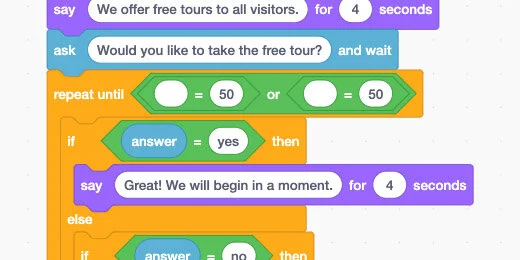
We want to repeat the opportunity to respond until a Yes or No is entered. Place an OR operator into the repeat loop parameter. This is known as a Boolean operator.

Place an Equal block in the left and right of the OR operator.
Place the Answer variable into the left side of both Equal operators. Place Yes for one Equal operation and No for the other.
This loop will repeat until one of the answers is Yes or No.
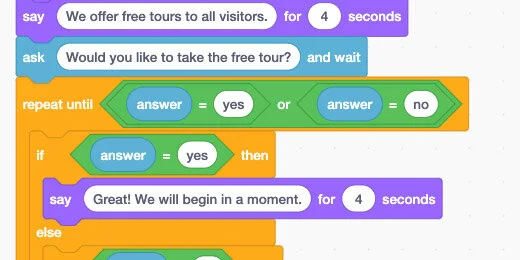
There is one more thing we need to do. The question must be within the loop. Rearrange the blocks so the question is before the If…then…else condition.

Go through the program. Enter anything other than Yes or No for the answer. The answer box will appear again to enter the correct response. Enter Yes or No and the prompts will no longer appear.