Prepare images for Scratch code projects
This lesson covers a process for preparing graphics and images for use with the Scratch coding environment.
Scratch is an excellent coding tool developed and maintained by MIT. The goal of the project is to teach young children to code through storytelling.
Scratch includes some images to develop basic stories. The images include backgrounds and Sprites. Sprites are the interactive characters on the stage. The stage is usually represented with a background or Backdrop.
We have the option to include our images for backgrounds and Sprites.
Here is the reason for this lesson. Scratch is limited to a specific resolution for images. This resolution I’m sure dates back to the early days of Scratch and the limitations of technology at the time. The resolution for all projects is set to 480 by 360 pixels or less. This is a low resolution compared to today’s standards.
The Scratch Forum provides information about the image format and resolution. It doesn’t appear they are going to change the resolution any time soon. We can work with this resolution but we need to consider the images used in our product.
Scratch recommends using the PNG, Portable Network Graphic, image format. Another standard recommended is the SVG, Scalable Vector Graphics, image format. We can also use the standard JPEG image format. This is used by all digital cameras and smartphones.
Image formats
Bitmap images
The PNG and JPEG image format is a standard for images known as bitmaps. The images are made of fixed pixels. Each pixel is represented by values that represent the colors for that image part of the image.
Pixels are not a problem when we are using images with millions of pixels. They become a problem when they are 480 by 360. The image below shows an image at 480 by 360 pixels. The black border is part of my image capture process. Click the image to have it pop out into full 480 by 360 resolution. Looks fine.
The image below is of the same image but enlarged. I took a snapshot of the center part of the original image. The image isn’t as crisp.
The pixels in the image are set at 480 by 360. Enlarging the image is like looking at the image under a microscope. We see all the ugly details. Enlarging the image causes the image to look worse.
Vector images
The other format for use in Scratch is SVG. This image format uses math to represent images. The shapes of the images are not locked in by the size of the image. The image format is often referred to as Vector graphics. The images are lines that can be resized and reshaped without looking quality.
The SVG format is one of many formats. The standard formats used today include EPS, Encapsulated PostScript, and AI. The AI format is from Adobe’s Adobe Illustrator program. Other less common formats include EMF—Enhanced MetaFile and WMF—Windows MetaFile. These formats are typically used on Windows computers.
The image below is an SVG image at 480 by 360.
This is a section of the image at 2,400 by 1,800 pixels. The image quality in vector graphics remains high. This is our goal.
Does it matter?
Scratch is designed for children and storytelling. Children usually aren’t as picky about the images. They look past the low quality in the age of Mine Craft.
Still, I thought this would be one of those teachable moments for those that want to get better quality images in their Scratch products. It provides the opportunity to learn a few more things. A few more technology life skills.
Vector over bitmap
Vector image quality is much better on Scratch than JPG or PNG. Download the lesson images below. There is one image of each JPG, PNG, and SVG. The file downloads as a ZIP file with all the images inside.
Go to the Scratch website, https://scratch.mit.edu. You don’t have to log into an account. This is just for demonstration purposes. Click the Create button.
Close the tutorial if it appears.
Click the Add Sprite icon. Select the option to upload a Sprite from your computer.
Select the JPEG image.
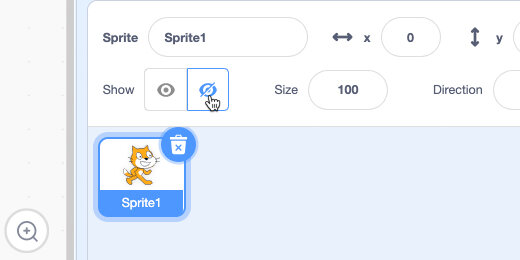
Click the Cat Sprite; click the hide button.
Click the Maximize button.
The JPEG image looks jaggedly and a little blurry. When an image looks like this, it is said to be pixelated.
Click the minimize button.
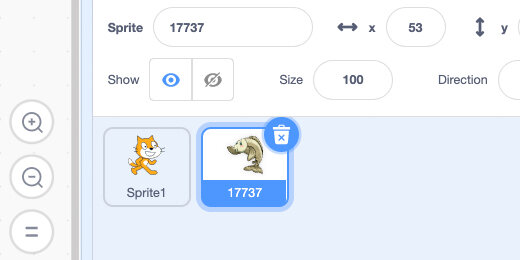
Select the JPEG fish Sprite; click the Hide button.
Upload the PNG version; view the image full screen. The image might be less blurry, but it has jagged edges too.
Minimize the image and hide the PNG image. Upload the SVG version and maximize the image. The quality of this image is much better.
Exit full-screen mode; exit the project.
Vector image resources
There are several places on the Internet to get vector images. There are a couple that I prefer. I prefer these services because they have high-quality images. The image services are free.
More precisely, they are a freemium service. You can download about ten images a day. To download more a day you need to purchase a subscription. I have never needed to download more than 10 images a day.
Using images from these services for free comes with a stipulation. You must give credit to the service or artist in your published product.
The services I like to use are freepik.com and pixabay.com. They offer high-quality images and graphics.
The links below are for the images to be used in this lesson. We are downloading several images to demonstrate how to deal with different formats and image options.
Each link is accompanied by a separate link to the same resource. I don’t have control over the images on these sites. One day they may not be available. The second Lin downloads the same image resource from my Google Drive. You don’t need a Google account to download them.
Large fish download from Freepik
Large fish download from Google Drive
We begin with the first image from freepik.com. This is an image of a large fish. Use the link to see the fish preview and click the Download button.

Click the green Free Download button.

Freepik provides an attribution link for the image. We are not publishing this image for the lesson so there is no need to copy the link at this time.

The image is downloaded to your computer in a compressed ZIP file. Your computer should extract the contents of the file as soon as it is downloaded. If not, you will need to double-click the ZIP file to extract the images and files.

Inside the folder, there are two images and a couple of text files. The text files contain information about the license for the image and attribution.
This image contains two image files. One is a standard JPEG; the other is an EPS file.

The EPS file needs to be converted for use in Scratch. I am not going to use a vector creation program like Adobe Illustrator. I will assume you don’t have one of these tools. I am also assuming your students don’t have access to this program on their computers. They are probably using a Chromebook.
We are using some free online tools. This makes it easier for teachers and students with Chromebooks and those that don’t have vector applications.
All we need to do is convert the file to the SVG format. I have links to three services. Each service is free. The services limit the number of files you can convert. I often bounce between the three services if I need to convert several files. I will cover the process for each service during the lesson.
Cloud Convert: https://cloudconvert.com/
Convertio: https://convertio.co/
Zamzar: https://www.zamzar.com/
Use the Cloud Convert link. Click the Select file button.

Go to the image folder and select the EPS file.

The file is placed into a conversion cue.

Use the convert selector to see the vector image options; select the SVG format.

Click the Convert button.

The file is uploaded and the conversion process begins. The process takes several seconds. I can also take a couple of minutes. It depends on how many conversions the site is working on at any moment.

A preview of the image appears when the conversion is complete. Click the Download button. Place the image inside the image folder downloaded from Freepik.

Scratch fish sandbox
Go over to the Scratch website—https://scratch.mit.edu/. Login and create a new project. Set the title of the project to Fish graphics.

Select the Cat Sprite; click the hide sprite button.
Click the Add Sprite button; choose the upload option.

Go to the image folder and select the SVG file.

The fish is added to our project Sprite library.
Change the name of the Sprite to Drink-Fish.

Select the Costumes tab.

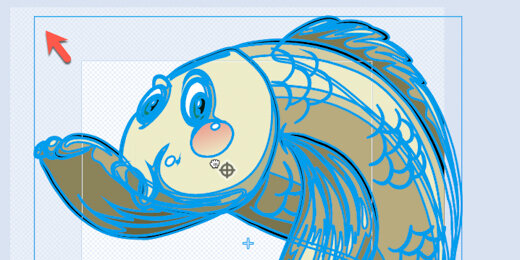
The image is too large. It doesn’t fit inside the Sprite canvas.

Click on any part of the image. Parts of the image are selected separately from the complete image. The illustration is created with several layers of shapes. Each shape can be moved and modified. Don’t move any of the shapes! If you did, click the undo button.

To resize the image, we need to gather all the shapes and place them in a container. We are grouping the shapes into one representation of the illustration.
The graphic tools in Scratch are basic. There is no tool to select everything on the canvas. We need to use our traditional computer shortcut keys. On Windows and Chromebook—press the key combination Control+A. On Mac—press Command+A.

Click the Group button.

Click the Zoom out button to see as much of the fish as possible.

Move the image down and to the right. Stop when you see the top left corner appear inside the dark gray checkerboard.
Use the corner handles to resize the image. Using the corner handles keeps the image aspect ratio and avoids distorting the image.

Scratch places a center reference marker on the image. Use the marker to align it to the center of the Sprite canvas. The center of the Sprite canvas has a dark dray marker.

Place image marker atop the canvas marker.

This Sprite is crisp and looks nice.

Multiple images
The first image was easy. Not all the images we want for a project are this easy. Let’s take a look at one with multiple images.
I like illustrations with multiple images. I get several images for a project from one illustration download.
Use the link below to download another illustration from Freepik. Click the Download button and open the ZIP file to reveal the folder with the images.
Sea animals download from Freepik
Sea animals download from Google Drive
This file contains an illustration with several fish images.


Select the EPS file.

Select the SVG option from the vector section.

Click the Convert button.

Click the Download button when the conversion is complete.

Place the converted image in the folder with the other images. Return to the Scratch project and upload the image as a Sprite.

Click on the Drink Fish Sprite and hide it.

Click on the Sprite we uploaded and select the Costumes tab.
Not all the fish illustrations fit within the canvas. They are all there but we can’t see them because they are spread out over a wide area.

Use the keyboard combinations to select everything in the canvas area. The keys are Control+A on Windows and Chromebook; Command+A on Mac.
We see the outlines of the other fish illustrations.

Click the Group button.

This illustration is much larger than the first example. You need to gradually move the grouped shapes down and to the right until the bounding corner appears.
You need to grab the illustrations to move the group. An empty area will not move the illustration.

Use the corner resize handle to make the illustration smaller. The illustration is so large you will run out of space.

Drag the illustration up and onto the canvas to finish resizing.

Make sure you can see all the images.

Keep the illustration selected; click the Ungroup button.

Click away from the illustration to deselect the grouped animals. You can also press the ESC key on your keyboard.

Click the Zoom-in button once; scroll to see the first fish in the upper left.

Draw a selection box around the first fish only. Make sure not to include any part of another animal.

Click the Group button; click the Copy button.

Go to the Add sprite button; select the paint option.

Click the Paste button.

Move the fish to the center of the canvas. Use the center reference mark to center the image.

Use the resize handles to make the illustration larger. Make sure it fills most of the canvas. The canvas is light gray area in the center.

Click on the Sprite with the collection of sea animals.

Go to the Costumes section; draw a selection around the crab illustration.
Group the illustration.
Click the Copy button.
Create a new Sprite with the Paint option.
Paste the illustration.
Center and resize it on the canvas.

Repeat this process with all the fish illustrations. In the end, you will have nine more fish Sprites.
Use the project link below to see each of the sprites as they should appear in your project.
https://scratch.mit.edu/projects/462185532
Hide the Sprites for the next part of the lesson.
Backgrounds
The process is much the same for background images. Use the link below to download the next image from Freepik.com.
Underwater background download from Freepik
Underwater background download from Google Drive
Download the illustration; unzip the file.
This illustration has four image files. One of the file types is for Adobe Illustrator. The EPS and AI files have two images embedded in the illustration. Artists might do this to conserve on the number of files distributed. The illustrations represent the same image in different sizes or aspect ratios.

We are going to use the Adobe Illustrator file this time. Use the link below to access Zamzar.
Use the Add Files button and select the AI file for upload.

Select SVG from the convert menu. Click the Convert Now button.

Zamzar offers three file download options. The first option will download both illustrations in one file. The other files represent each of the two illustrations. Download the first file to get both.

The illustrations are in a compressed file. Open the compressed files. Place the illustrations inside the folder. Return to the Scratch site. Click the Add Background button and choose Upload.

We are going to upload both files. Select the page 01 file and upload it first. Use the same process to upload the second illustration page.
The backgrounds are added to the Backdrops section. The tab opens after the image is uploaded.

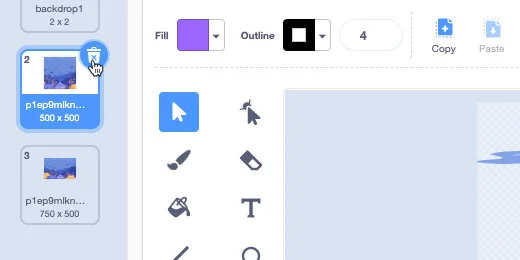
Click on the first backdrop we uploaded. This illustration is wider than it is tall. Scratch has trouble with illustrations that are not in the 4:3—four-by-three aspect ratio.

Select the second illustration. This one is closer to the 4:3 ratio. It looks better than the first.

The first illustration isn’t usable. Select the illustration and click the Trash icon.
This illustration is like Sprite imports. It is a group of shapes and lines. Select all the shapes by using the shortcut keys; click the Group button.
The area outline with a white border represents the visible stage area. Resize the backdrop so most of it appears within the area.

The background is ready for a nice ocean project.
Regular images
We can’t always find the image we want as an illustration. Sometimes we need to use a regular image. We will lose some detail when using regular images. There is a way to minimize the pixelation or detail loss.
We are going to use Google Drawings to resize and crop the image before importing. Scratch prefers background images in the 4:3 aspect ratio. Cropping the image to this size reduces the amount of some pixelation.
Use the link below to download the next image.
Underwater scene download from Freekpik
Underwater scene download from Google Drive
Create a new Google Drawing document. Use the link below to create one.
https://drawings.google.com/new
The Google Drawing canvas is already at the required 4:3 aspect ratio.
Go to the Insert menu option and select Upload from the computer.

Select the image to upload. The image needs to fill the drawing canvas. Use the corner handles to resize the image.

The image is wider than the canvas. The part of the image that is off the canvas will be cut off during export. We need to control what is cut away.
Make sure the image is selected; click the Crop tool.

Black crop handles appear around the image. They are in the same positions as the Resize handles.

My image extends off the canvas on the right side. I need to grab the crop handle and move it toward the left.

A crop line follows the resize handle. Move the handle to the edge of the canvas. Use the ruler as a guide. The line will also snap to the edge of the canvas.

The area that is slightly dimmed will be hidden on export. Part of the Clown fish’s tail will be cut away along with the nice reef. We don’t want this to happen.

Click and drag the image to the left. It’s a little hard to see but the right edge of the image is moving to the left. The red horizontal line is the vertical center alignment guide. Use the guide to keep the image centered vertically.

Moving the image with the mouse in crop mode doesn’t give much feedback when moving. Use the Left or Right keys on your keyboard to move the image left or right.
The arrow keys jump the image about five pixels at a time. You can get finer movement by holding the Shift key while using the left and right arrow keys.
Move the image to the left so the right edge of the image is on the canvas. Press the ESC key to exit Crop mode.

Click File; go to Downloads and select PNG image.

Switch over to Scratch and upload this image as a Backdrop.

Transparent backgrounds
I’m not talking about images that are transparent. I’m talking about images of an object without a background.
When creating projects we might need an image of an object or person without the surrounding background. The image below is an example. The gray and white squares around the turtle represent the transparent part of the image.
The latest online technologies and services make the process of removing backgrounds from objects simple.

Use the link below to download the next image.
Underwater turtle download from Freekpik
Underwater turtle download from Google Drive
The image is of a Sea Turtle. It is the only object in the image. There is a lot of contrast between the turtle and the background. This is key to getting good results.

There are a couple of sites I use to remove backgrounds from images. The links are available below.
Use the link to access https://remove.bg. Click the Upload image button; select the image.

The process begins almost immediately. The original and processed images are shown side by side.

Use the crop handles to crop away unwanted empty background.

Click the Download button. Click the Download in Low-Resolution button.

Upload this image to the Scratch project as a Sprite. The turtle is over the backdrop and looks like it is part of the underwater scene.

Student images
We want our students to be part of the storytelling project. Adding students to a project is just as easy. Use the link below to download an image of this student with a graduation cap.

Open another tab and go to https://remove.bg; upload the image. Download the image and add it to your project as a Sprite.
Use the link below to see how I combined the image with a backdrop.
https://scratch.mit.edu/projects/465066313
One more example
We don’t need to download images from a web service. We have nice high-quality cameras on our phones. Use the camera to take pictures of students or props to use in the story.
Our cameras take good high-resolution images. These images are often too large for the online background remover to process. The limit for https://remove.bg is 12MB.
Here is a freemium online tool that will help us reprocess the image. Reprocessing the image will reduce the file size without reducing quality. While we are on the site we will crop the image to focus our attention on the student.
Use the link below to download the next image.

The file size for this image is over 13MB.

Open a tab and go to https://befunky.com. This is a freemium online photo editor. The free services are all we need for this example.
On the site, you can log in with a Google, Facebook, or email account. We don’t need to login for this example. I encourage you to create an account and login. This will save your work.
Click the Create button. Click the Get Started button if you didn’t create an account or log in.

Select the Photo editor option.

Click the Open option and select open from the computer.

Select the image we just downloaded. The image opens in an editor. We don’t need to do anything special. All we do is save the image. Click Save and select Computer.

The estimated size for the image is now 1.6 MB. Don’t download the image yet.

Let’s modify the image before we save it. Click the Cancel button.
Click the Crop tool

Use the corner handles of the Crop box to cut away a lot of the background.

Crop the image so the focus is on the little girl.

Click the Check button to apply the crop.

Click the Save button and save the image to your computer.
Go to the background removal website—https://remove.bg. Upload the image and remove the background. Download the image and add it to your project as a Sprite.
Use the link below to see this image used with a backdrop. The backdrop is another image from Freepik.com.